[strong-heading url=”#” ] Beyond Point and Shoot//+[/strong-heading]
Most trigger happy clickers would get their knickers in a twist over whether Photography is a science or an art. Most, though, would agree to meet midway and define it as a complex yet elegant homogeneous mix of both. Over the centuries, man has tried to capture what he sees, either by scratching on cave walls with stone equipment, or by flicking out his iPhone.
Technology has made photography so drastically popular thanks to ease in consuming this technology that anyone with an urge to capture the moment can do it within the blink of an eye. In this article, we’ll be dealing with topics in photography with a strong bias towards the digital medium. We’ll try to cover technique, equipment, hardware and even online resources for social sharing of your work.
dSLR Concepts
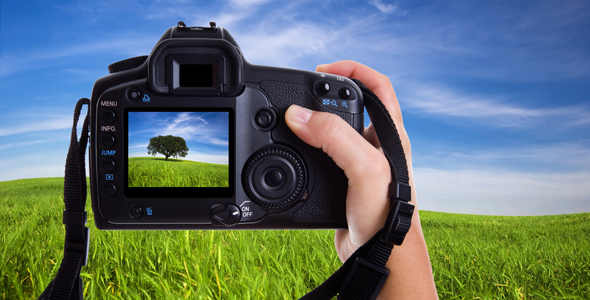
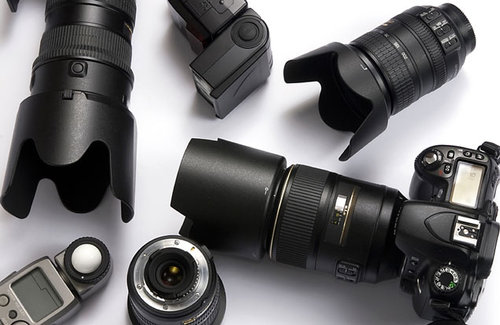
The acronym dSLR stands for digital single lens reflex camera. The main advantage and difference of this type of camera over simple point and shoot cameras arises in the way the photographer sees the scene via the camera. SLR cameras have a WYSIWYG approach, where the viewfinder and the photographer see the exact same things as the final capture. This is also its biggest advantage over simple point-and-shoot cameras, where the viewfinder is merely a window in the camera body giving rough estimate of the final output. This might sound like a minor difference, but in reality, makes SLRs a photographer’s dream, and the main reason for their ever increasing popularity.
To understand how an SLR camera achieves this, consider the following – light enters the camera’s body, hits the inclined mirror in between the lens assembly and the sensor of the camera and is transferred to the penta-prism. When we see through the viewfinder, we see the light reflected by this penta-prism, which focuses it, so as to be directly observable via the photographer’s eye. As you press the shutter button, the viewfinder is blocked for an instant. This happens because the inclined mirror reflecting the lift-swings upwards, allowing the light that comes in through the lens to hit the sensor directly thereby exposing it and capturing the exact image. While this process may sound a tad too long, any entry level SLR will be able to achieve the entire operation three times a second or more.
Image Formats – RAW or JPEG?
This is a question every photographer has faced at some point or the other. Countless discussion threads and references cover this debate, concerning issues ranging from basics like size and quality to advanced technicalities like color bits per channel, compression etc. in simple terms, RAW data is the output from every original red, green or blue sensitive pixel of the image sensor, after being read by array electronics and having passed through analog to digital convertors. In comparison to storing data as a JPEG format, RAW file data goes through the Bayer interpolation filter and is modified as per set parameters like white balance, sharpness etc. before being subjected to JPEG compression and then stored, ready for viewing and printing immediately after the shot.
File sizes are smaller in JPEG and can be interpreted by many programs giving it a basic advantage over RAW but a counter effect is the loss in quality proportionate to the compression. The exact way in which JPEG images are processed within the camera varies from model to model, depending on the camera settings for parameters like color temperature and exposure. It also involves internal processing for characteristics such as contrast, brightness, noise reduction and sharpness. You may come across terms like ‘dynamic range’ commonly thrown around then discussing the RAW vs. JPEG topic. This is simply an indicator of the amount of tonal range detail from the darkest shadows to the brightest highlights.
Image Processing
Taking the perfect shot is all about technique, style, timing and a bit of good old luck. But after you finally manage a worthy original click, there is still a lot that can be done to make your pictures stand out. Post processing has slowly emerged as one of the most critical aspects in giving your photos a sense of character and making the overall effect more dramatic in a way.
Though a pretty popular and highly utilized option today, this is still a topic of debate in photography circle as some purists consider it as cheating or trying to find an easier way out. The arguments of both sides are numerous and very subjective. The basic idea behind post processing is to make the photo look more like how you saw it rather than how the camera captured it. All cameras used these days, from simple phone ones to complex SLR systems, have options to adjust simple parameters like contrast, color, sharpness etc. but once a picture has been taken, there is always scope to play around with these and other added features in the post processing stage to get a more soulful shot.
Obviously the critical part here is the editing part where your intuition and aesthetic sense as a photographer will matter most. And which can really make or break the look you are trying to achieve. In the following section we’ll go through what are the main elements you’ll need to alter, and how to actually do so. Since most steps you’ll follow are fairly standard and universal so most photo editing software should work.
White Balance Adjusting
One of the first things you should adjust is the white balance of your photo. WB is the process of removing unrealistic color casts so that objects appear white in person when rendered white in your image. The color temperature of the light source is to be taken into account here, meaning the relative warmth or coolness of white light as you physically see it. Since the correct white balance affects the entire feel of a picture, right from the color saturation to the contrasts, it’s a crucial parameter to be set right. Fortunately, most digital cameras contain a variety of preset white balances so during critical shots you don’t have to deal with color temperatures every time.
Adjusting the Exposure
The next step in the editing process is generally exposure compensation and recovery. Though it is always desired that everything possible is done to get and accurate exposure at the time of capturing, this is not always practically possible, thus arises the need of exposure compensation or adjustment. An objective guide to this is analyzing the image histogram, which essentially tells you whether or not you image has been properly exposed or not, whether the lighting is harsh or flat and what adjustments will work best, helping you gain a better theoretical understanding of the subject, on just on the computer but also as a photographer. You should pay extra attention to whether there are any blown highlights or lost shadow details and on most software you might be able to recover these by simple options like ‘fill light, ‘recovery’ or ‘blank point’ tools.
Reduce Noise
Once you WB and exposure are set you can start working on cleaning the image by noise reduction, and this will be most effective if done before other image editing like contrast, sharpness etc. Image noise can be treated as the equivalent of film grain for analogous cameras which becomes apparent as random speckles in the picture, significantly degrading overall quality and compromising on the level of details. Sometimes this noise is desirable if you are going for and old fashioned grainy look, or want to increase the apparent sharpness of the image. In case you need a major clear up, you can even make use of dedicated software like Noise Ninja, Neat Image etc. In certain specialized scenarios a technique referred to as Image Averaging is used when you cannot afford to lose out on sharpness because of noise reduction.

